
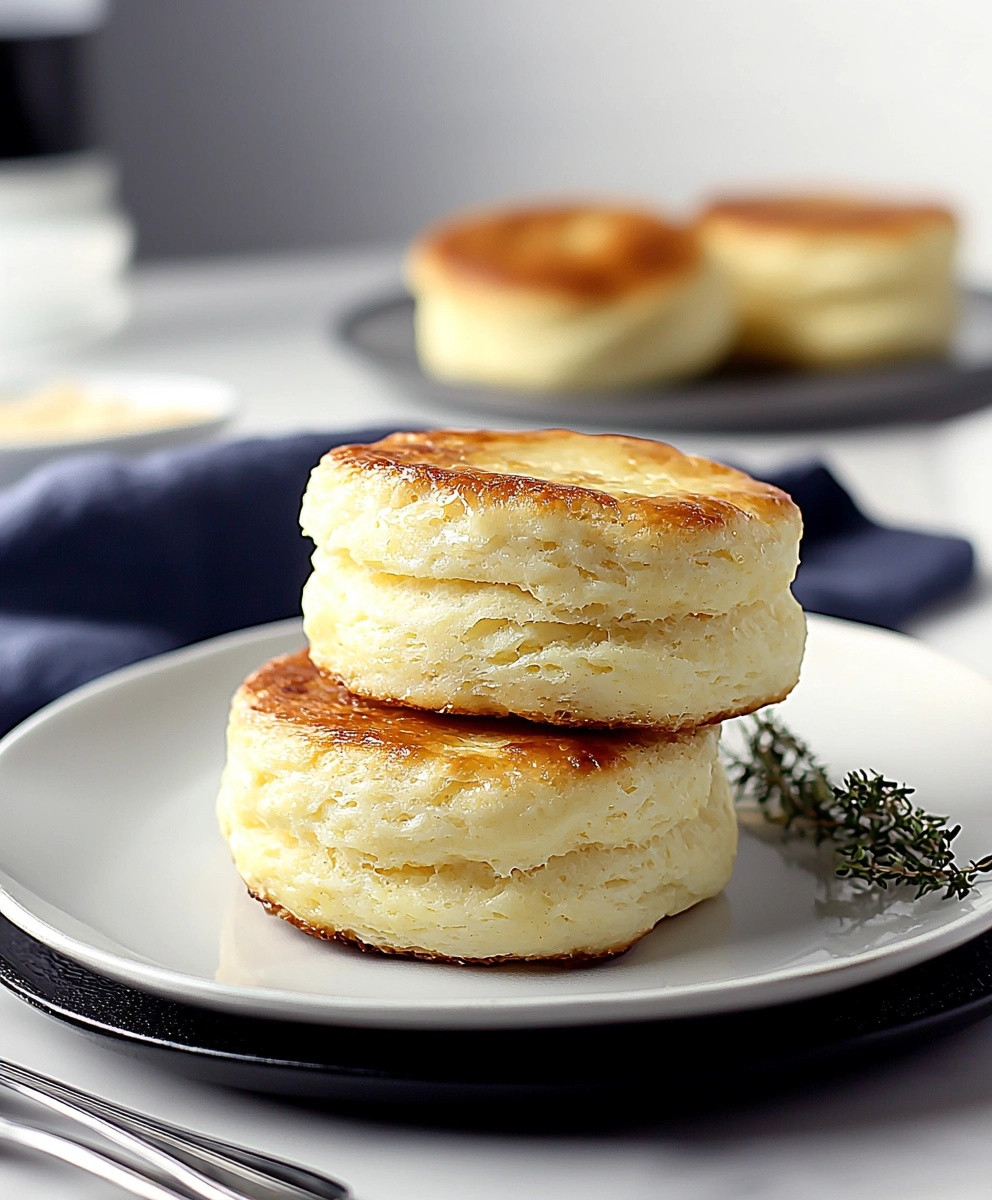
Buttery Stovetop Biscuits are a delightful addition to any meal, and I cant wait to share this recipe with you! Imagine biting into a warm, flaky biscuit that melts in your mouth, all without the need for an oven. This recipe is not only quick and easy but also brings a touch of nostalgia, as stovetop biscuits have been a beloved staple in many households for generations. Originating from the need for a fast and convenient bread option, these biscuits have stood the test of time, becoming a favorite for busy families and home cooks alike.
People love Buttery Stovetop Biscuits for their incredible taste and texture. The buttery flavor combined with a soft, pillowy interior makes them perfect for breakfast, lunch, or dinner. Plus, they can be whipped up in just a matter of minutes, making them an ideal choice for those hectic days when you want something delicious without the fuss. Join me as we dive into this simple yet satisfying recipe that will surely become a staple in your kitchen!

Ingredients:
- 2 cups all-purpose flour
- 1 tablespoon baking powder
- 1 teaspoon salt
- 1/2 teaspoon baking soda
- 1/2 cup unsalted butter, cold and cubed
- 3/4 cup buttermilk
- 1 tablespoon honey (optional, for a touch of sweetness)
- Extra butter for brushing on top
Preparing the Dough
Lets get started on these delicious buttery stovetop biscuits! First, we need to prepare our dough. Follow these steps:
- In a large mixing bowl, combine the all-purpose flour, baking powder, salt, and baking soda. Whisk them together until they are well mixed. This will ensure that the leavening agents are evenly distributed throughout the flour.
- Next, add the cold, cubed butter to the flour mixture. Using a pastry cutter or your fingers, work the butter into the flour until the mixture resembles coarse crumbs. You want to see small pea-sized pieces of butter throughout the mixture. This is what will make our biscuits flaky and buttery!
- If youre using honey, drizzle it into the mixture now. It adds a subtle sweetness that complements the buttery flavor beautifully. Stir it in gently.
- Now, pour in the buttermilk. Use a spatula to gently fold the mixture together until it just comes together. Be careful not to overmix; a few lumps are perfectly fine. Overmixing can lead to tough biscuits, and we want them to be light and fluffy!
Shaping the Biscuits
Once your dough is ready, its time to shape those biscuits!
- Turn the dough out onto a lightly floured surface. Gently pat it into a rectangle about 1-inch thick. You can use your hands or a rolling pin, but remember to handle the dough as little as possible to keep it tender.
- Using a sharp knife or a biscuit cutter, cut the dough into squares or circles. If youre using a knife, you can simply cut the rectangle into squares. If youre using a biscuit cutter, press it straight down without twisting to ensure the biscuits rise properly.
- Gather any scraps of dough, gently knead them together, and cut out additional biscuits. Try to minimize the handling of the dough to keep it light and fluffy.
Cooking Process
Now that we have our biscuits shaped, its time to cook them on the stovetop!
- Heat a large skillet over medium heat. I like to use a cast-iron skillet for even cooking, but any heavy-bottomed skillet will work.
- Once the skillet is hot, add a tablespoon of butter and let it melt, coating the bottom of the skillet. This will give our biscuits a lovely golden color.
- Carefully place the biscuits in the skillet, making sure they are not touching each other. You may need to cook them in batches depending on the size of your skillet.
- Cover the skillet with a lid. This is crucial as it traps the steam, helping the biscuits rise. Cook the biscuits for about 8-10 minutes on the first side, or until they are golden brown.
- After 8-10 minutes, carefully flip the biscuits over using a spatula. Add another tablespoon of butter to the skillet if needed, and cover again. Cook for an additional 5-7 minutes, or until the second side is golden brown and the biscuits are cooked through.
Finishing Touches
Once your biscuits are cooked, its time to add that final touch of buttery goodness!
- Remove the biscuits from the skillet and place them on a plate lined with paper towels to absorb any excess butter.
- While they are still warm, brush the tops with melted butter. This adds an extra layer of flavor and keeps them moist.
- Serve the biscuits warm, either on their own or with your favorite toppings. They are perfect with honey, jam, or even a drizzle of gravy!
Storing Leftovers
If you
Conclusion:
In conclusion, these buttery stovetop biscuits are an absolute must-try for anyone looking to elevate their breakfast or brunch game. The ease of preparation combined with the rich, flaky texture makes them a standout choice for both novice and experienced cooks alike. Whether you enjoy them slathered with butter and jam, paired with a hearty bowl of gravy, or simply on their own, these biscuits are sure to impress. For a fun twist, consider adding herbs like rosemary or thyme to the dough for an aromatic flavor boost, or try incorporating shredded cheese for a savory variation that will delight your taste buds. You can even experiment with different toppings, such as honey or a sprinkle of cinnamon sugar, to create a sweet version thats perfect for dessert. I wholeheartedly encourage you to give this recipe a try! I promise you wont be disappointed. Once youve made your own buttery stovetop biscuits, Id love to hear about your experience. Share your thoughts, any variations you tried, or even a photo of your delicious creations. Lets spread the joy of cooking together! Print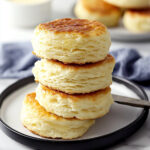
Buttery Stovetop Biscuits: Easy Recipe for Fluffy Homemade Goodness
- Total Time: 30 minutes
- Yield: 8–10 biscuits 1x
Description
These buttery stovetop biscuits are quick to prepare and offer a flaky, tender texture without the need for an oven. Ideal for breakfast or as a side, they can be enjoyed warm with honey, jam, or gravy.
Ingredients
- 2 cups all-purpose flour
- 1 tablespoon baking powder
- 1 teaspoon salt
- 1/2 teaspoon baking soda
- 1/2 cup unsalted butter, cold and cubed
- 3/4 cup buttermilk
- 1 tablespoon honey (optional, for a touch of sweetness)
- Extra butter for brushing on top
Instructions
- In a large mixing bowl, combine the all-purpose flour, baking powder, salt, and baking soda. Whisk until well mixed.
- Add the cold, cubed butter to the flour mixture. Using a pastry cutter or your fingers, work the butter into the flour until it resembles coarse crumbs.
- If using honey, drizzle it into the mixture and stir gently.
- Pour in the buttermilk and gently fold the mixture together until it just comes together. Avoid overmixing.
- Turn the dough out onto a lightly floured surface and pat it into a rectangle about 1-inch thick.
- Cut the dough into squares or circles using a sharp knife or biscuit cutter. Gather scraps, knead gently, and cut out additional biscuits.
- Heat a large skillet over medium heat and add a tablespoon of butter, letting it melt.
- Place the biscuits in the skillet, ensuring they are not touching. Cover with a lid and cook for 8-10 minutes until golden brown.
- Carefully flip the biscuits, adding another tablespoon of butter if needed, cover again, and cook for an additional 5-7 minutes until the second side is golden brown.
- Remove the biscuits from the skillet and place them on a plate lined with paper towels. Brush the tops with melted butter while warm.
- Serve warm with your favorite toppings.
Notes
- For best results, handle the dough as little as possible to keep the biscuits tender.
- A cast-iron skillet is recommended for even cooking.
- These biscuits can be stored in an airtight container for up to 2 days or frozen for longer storage.
- Prep Time: 15 minutes
- Cook Time: 15 minutes